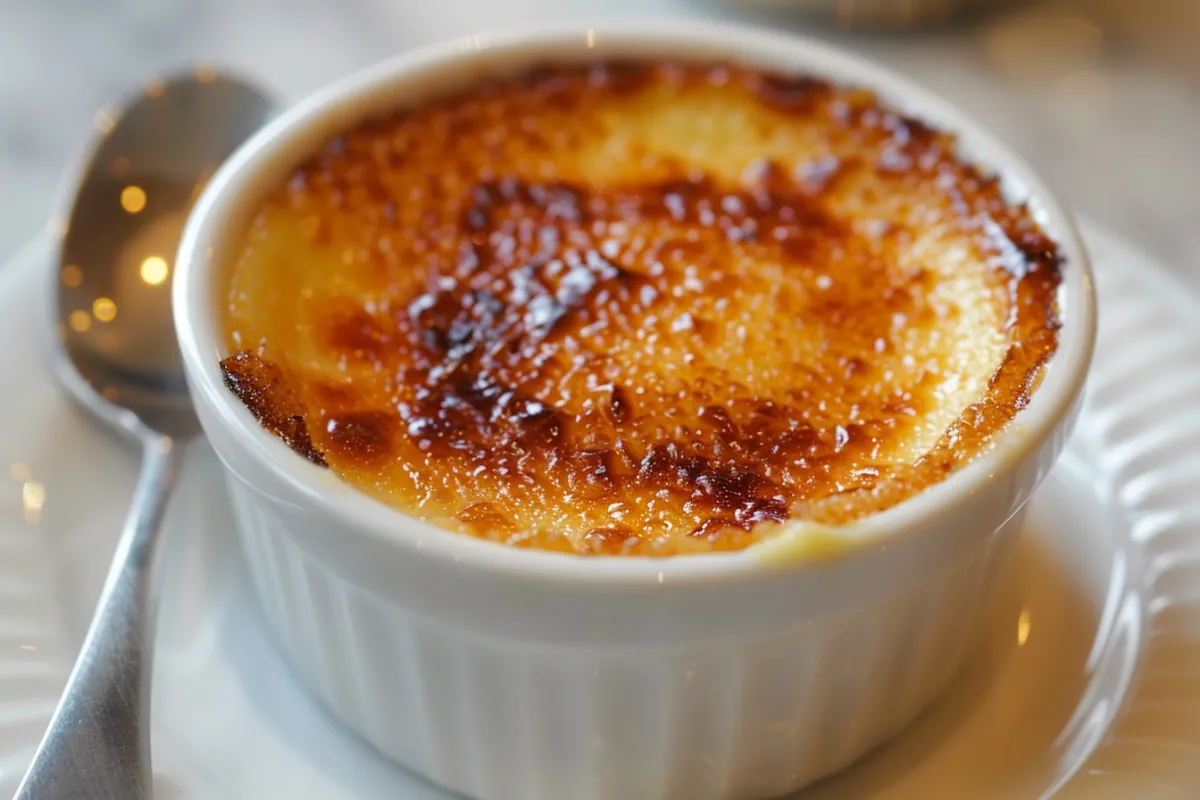
Brulee topping is the signature crispy sugar crust that crowns the famous French dessert crème brûlée and other similar desserts. The term “brulee” means “burnt” in French, which describes the process of caramelizing sugar to form a hard, glassy surface that cracks beautifully when tapped with a spoon. While it may seem challenging, creating a perfect brulee topping is relatively easy with the right tools and techniques. This comprehensive guide will walk you through everything you need to know to master the art of brulee topping, suitable for an 8th or 9th-grade reading level.
What is Brulee Topping?
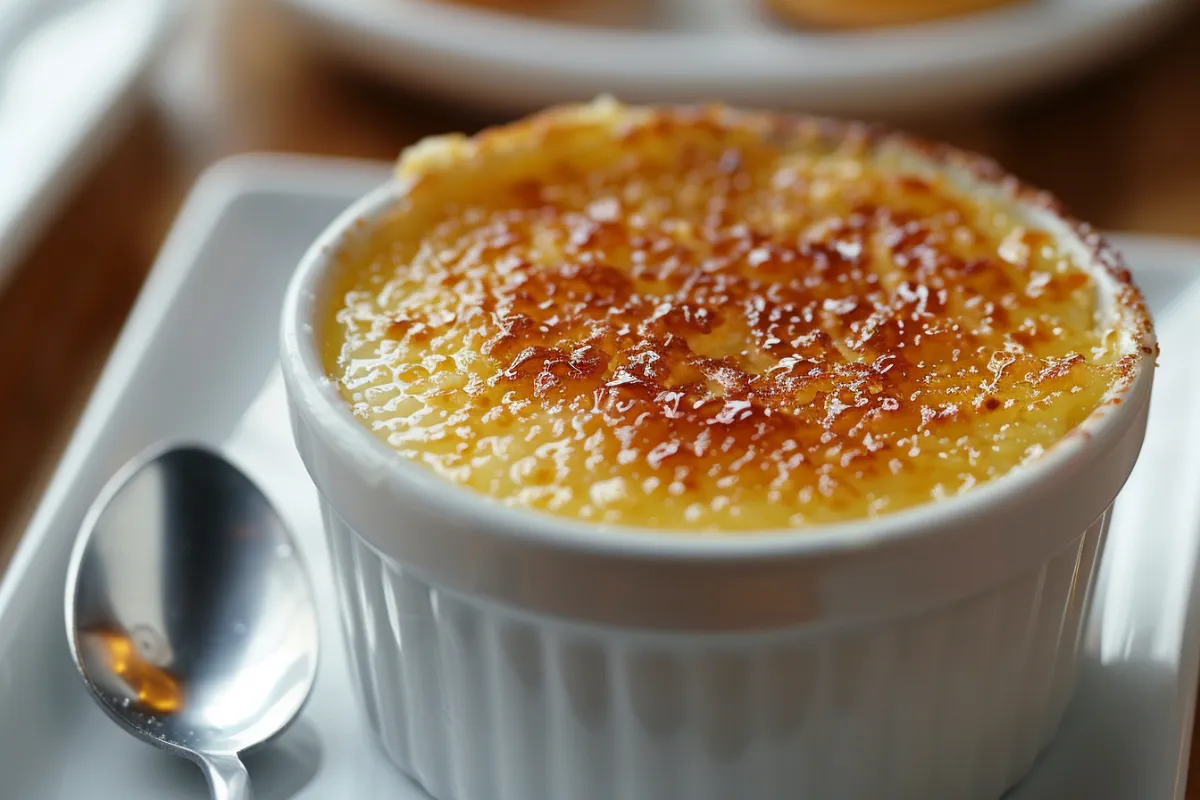
Brulee topping is a thin layer of caramelized sugar that sits on top of creamy desserts like crème brûlée, giving it a crunchy, slightly sweet contrast to the soft custard underneath. To create this topping, sugar is sprinkled on the dessert and then heated until it melts and caramelizes. The heat source can come from a kitchen torch, broiler, or grill lighter, depending on the tools you have available.
The process might seem intimidating, but it’s quite straightforward, as we’ll show you step by step. The goal is to achieve a thin, even layer of caramelized sugar that cracks when broken with a spoon, providing both texture and flavor to the dessert.
Ingredients for Brulee Topping
The key to a perfect brulee topping lies in using the right ingredients and the correct technique for caramelizing the sugar.
Basic Ingredients:
- Sugar: Granulated sugar is the most commonly used sugar for brulee topping, but caster sugar is often recommended because of its finer texture. Caster sugar melts more evenly, producing a smoother, more uniform crust.
- Dessert base: Although crème brûlée is the most well-known dessert that uses brulee topping, you can use this technique for other desserts such as lemon tart, oatmeal, or cheesecake.
Here’s a quick comparison of different sugar types and their effects:
| Sugar Type | Texture | Flavor Impact |
|---|---|---|
| Granulated Sugar | Coarse | Classic crisp topping |
| Caster Sugar | Fine | Smoother, more even caramelization |
| Brown Sugar | Coarse | Adds a deeper caramel flavor |
Using the right sugar ensures that your brulee topping melts properly and develops the perfect crunch.
Desserts that Use Brulee Topping
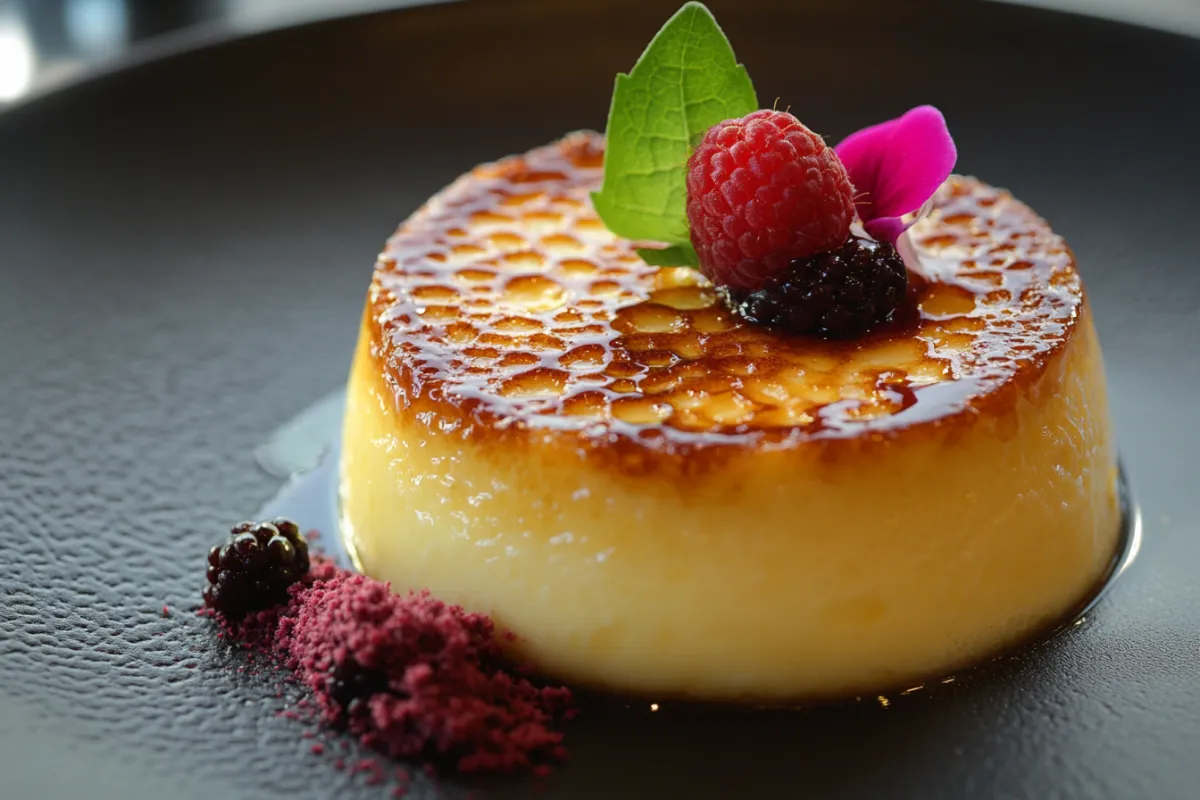
Brulee topping is most commonly associated with crème brûlée, but this caramelized sugar crust can be used to enhance many other desserts as well. By adding brulee topping, you introduce a crunchy texture and sweet flavor to various dishes, making them more exciting and delicious.
Popular Desserts for Brulee Topping:
- Crème brûlée: The classic French dessert features a rich vanilla custard with a crunchy caramelized sugar top.
- Lemon tart: A tart base topped with brulee sugar adds a delicious contrast between the tangy lemon and the sweet, crunchy topping.
- Bruleed oatmeal: A healthy yet decadent breakfast option that uses caramelized sugar to add a sweet finish.
- Cheesecake: Adding a brulee topping to a creamy cheesecake creates a delightful contrast of textures.
These desserts demonstrate the versatility of brulee topping, proving that it can be applied to more than just custards. Whether it’s a simple tart or an elaborate cheesecake, a brulee topping elevates the presentation and taste of the dessert.
Techniques for Making Brulee Topping
Creating the perfect brulee topping involves carefully melting sugar without burning it or melting the dessert underneath. There are several techniques you can use to achieve this effect, each with its advantages and disadvantages.
1. Using a Kitchen Torch
A kitchen torch is the preferred tool for making brulee topping because it gives you precise control over the heat. This allows for even caramelization without affecting the temperature of the custard below.
Steps:
- Sprinkle an even layer of sugar over the top of your dessert.
- Turn on the kitchen torch and hold it about 2-3 inches above the sugar.
- Move the torch in circular motions, ensuring the sugar melts and caramelizes evenly.
- Let the caramelized sugar cool for a few minutes before serving, allowing it to harden and form that signature crack.
Pros: The torch method offers the most control, ensuring an even and perfectly caramelized crust.
Cons: Requires purchasing a specialized tool, which may not be practical for everyone.
2. Using the Broiler
If you don’t have a kitchen torch, the oven broiler is a good alternative for caramelizing sugar. However, it offers less control and can sometimes cause the sugar to caramelize unevenly.
Steps:
- Set your oven broiler to the highest setting.
- Place the dessert under the broiler, positioning it on the top rack about 3-4 inches away from the heat source.
- Broil for 1-3 minutes, watching closely to avoid burning the sugar.
- Remove the dessert once the sugar is evenly caramelized and golden.
Pros: No special tools are required, making it accessible to everyone.
Cons: Less control over the heat and caramelization process. The broiler can sometimes warm the custard underneath, affecting its texture.
3. Using a Grill Lighter (Alternative Method)
In a pinch, a grill lighter can be used to caramelize small sections of sugar on top of your dessert. This method is slower but works well if you’re making a small dessert or don’t have access to a broiler or torch.
Steps:
- Sprinkle sugar evenly over the dessert.
- Use a strong flame grill lighter and hold it very close to the sugar.
- Move the flame back and forth, ensuring the sugar melts and caramelizes as evenly as possible.
Pros: Most people have a grill lighter at home, so this method is widely accessible.
Cons: Slow and difficult to achieve even caramelization across a large surface.
Step-by-Step Guide: How to Make the Perfect Brulee Topping
Now that you know the different techniques, let’s break down the steps for making the perfect brulee topping. This guide assumes you’re using the torch method, which provides the most consistent results.
Step 1: Prepare the Dessert
Make sure the dessert is fully chilled and set. If you’re making crème brûlée, for example, it should be cold from the fridge before you begin bruleeing the top. This helps keep the custard intact and ensures the sugar doesn’t melt into the dessert.
Step 2: Choose the Right Sugar
Opt for caster sugar if available, as its finer texture melts more evenly. Granulated sugar can also work but may leave a coarser texture.
Step 3: Apply the Sugar Evenly
Sprinkle 1-2 teaspoons of sugar evenly across the surface of the dessert. Gently shake or tilt the dish to spread the sugar into a thin, even layer. Too much sugar can result in a thick, overly hard crust, while too little may not create the desired crunch.
Step 4: Caramelize the Sugar
Use your chosen method—whether a torch, broiler, or lighter—to melt the sugar. Focus on achieving an even, golden-brown layer without burning any spots.
Once done, let the sugar cool for a minute or two before serving. This gives the caramelized layer time to harden and develop that desirable crack when tapped.
Common Mistakes to Avoid
Even though making brulee topping is straightforward, a few common mistakes can lead to less-than-perfect results. Here are the top issues and how to avoid them:
Overburning the Sugar
When using a torch, it’s easy to leave it in one spot for too long, which can cause the sugar to burn. To avoid this, move the torch continuously in a circular motion. This ensures the sugar melts evenly without burning.
Uneven Caramelization
If the sugar layer is too thick or uneven, it can caramelize in patches. Make sure to apply a thin, even layer of sugar, and distribute it evenly by tilting the dish if necessary.
Soggy Custard
A soggy custard occurs when too much heat is applied to the dessert, causing the custard underneath to melt. To prevent this, always start with a fully chilled dessert and avoid prolonged exposure to direct heat.
FAQs
1. What type of sugar works best for brulee topping?
Answer: Caster sugar works best because it melts more evenly and creates a smoother texture. Granulated sugar can also be used, but it may result in a coarser, thicker crust.
2. Can you make brulee topping without a torch?
Answer: Yes, you can use your oven’s broiler or even a strong grill lighter to caramelize the sugar. However, a kitchen torch provides the best results due to its precise control over the heat.
3. How long should you torch the sugar?
Answer: It usually takes 1-2 minutes of torching, depending on the strength of your torch and the thickness of the sugar layer. Aim for a golden-brown color, and move the torch continuously to avoid burning.
4. Can you store desserts with brulee topping in the fridge?
Answer: It’s best to serve bruleed desserts immediately after caramelizing the sugar. If youcan prepare the custard ahead of time, it’s best to wait until right before serving to caramelize the sugar. Once bruleed, the sugar will eventually absorb moisture from the custard and soften, losing its crisp texture. For the best results, store the custard in the refrigerator without the brulee topping and add the sugar just before serving.
Advanced Tips for the Perfect Brulee Topping
Achieving the perfect brulee topping requires attention to detail. Here are some advanced tips to elevate your brulee-making skills:
1. Use Flavored Sugars
For an extra layer of flavor, try using flavored sugars. Vanilla sugar, cinnamon sugar, or even citrus-infused sugar can add a unique twist to your brulee topping. Simply mix your desired flavoring with granulated or caster sugar and proceed with caramelizing it as usual.
2. Experiment with Thickness
The thickness of your sugar layer affects the final result. A thicker sugar layer will give you a more pronounced crunch, while a thinner layer creates a delicate, glass-like crack. Experiment with different amounts of sugar to find your preferred texture.
3. Let the Sugar Cool
After caramelizing the sugar, let it cool for at least a minute or two before serving. This allows the sugar to harden fully, ensuring that satisfying crack when you tap it with a spoon.
4. Layering for Extra Crunch
For an extra-crunchy topping, apply a second layer of sugar after the first one has been caramelized. Caramelize the second layer just like the first for a thicker, double-brulee topping that adds even more texture.
How to Serve and Store Desserts with Brulee Topping
Serving Bruleed Desserts
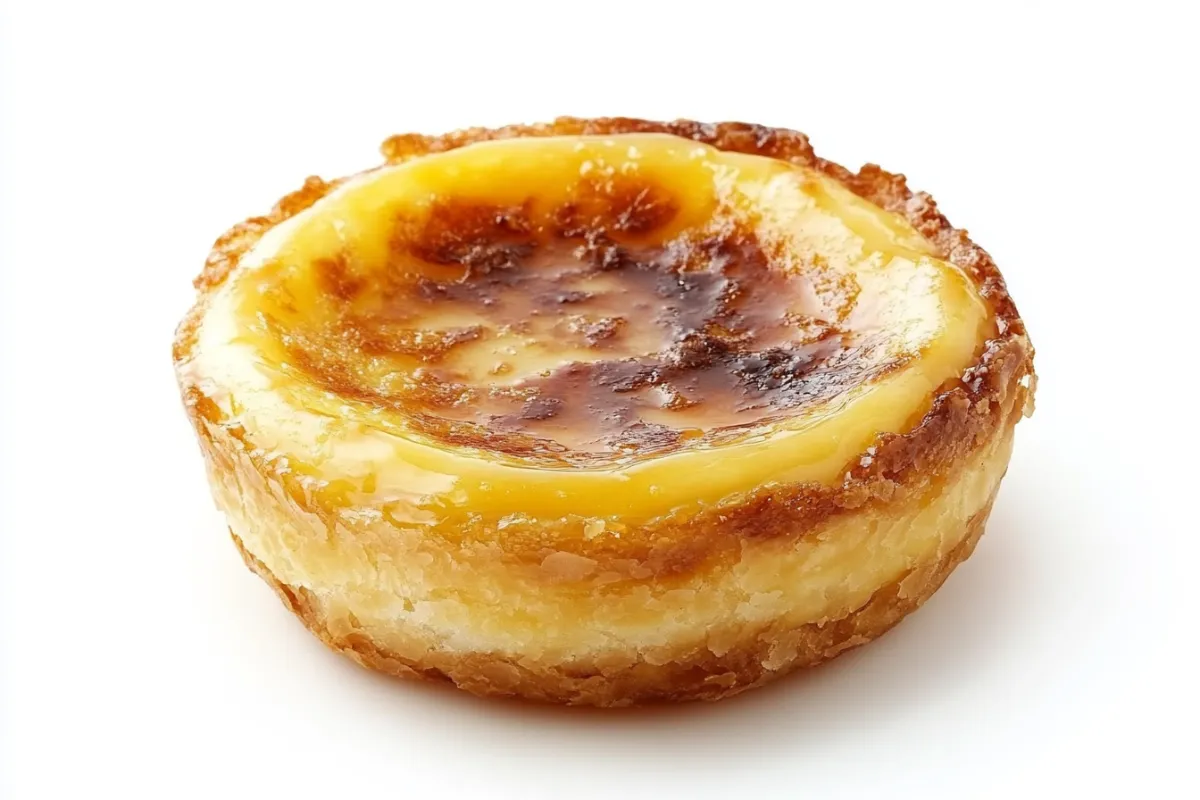
The best time to serve desserts with brulee topping is right after caramelizing the sugar. This ensures that the sugar maintains its crisp texture and the satisfying “crack” when you break it with a spoon. If you wait too long after caramelizing, the sugar can soften, especially if the dessert is kept in the refrigerator.
Tip: If you’re making crème brûlée for a dinner party, prepare the custard ahead of time, but brulee the topping just before serving to impress your guests with the freshly caramelized sugar.
Storing Bruleed Desserts
If you’re not serving your dessert immediately, store it in the refrigerator without the brulee topping. When ready to serve, simply add the sugar and caramelize it using a torch or broiler.
Important: Do not attempt to refrigerate desserts with brulee topping after the sugar has been caramelized, as the topping will absorb moisture from the custard and become soggy. For best results, always caramelize the sugar right before serving.
Conclusion
Mastering the art of making brulee topping is a rewarding skill that can elevate many desserts, from the classic crème brûlée to more creative applications like bruleed oatmeal or cheesecake. The combination of a creamy base with a crispy, caramelized sugar topping creates an irresistible texture and flavor contrast.
Whether you’re using a torch, broiler, or even a grill lighter, the key to a perfect brulee topping is in the technique and careful attention to detail. With the right tools, ingredients, and tips outlined in this guide, you’ll be well on your way to impressing friends and family with your brulee-making skills.
Remember, the secret to success lies in practice, so don’t be afraid to experiment with different methods and sugar types until you find the perfect balance for your taste. Happy bruleeing!

